


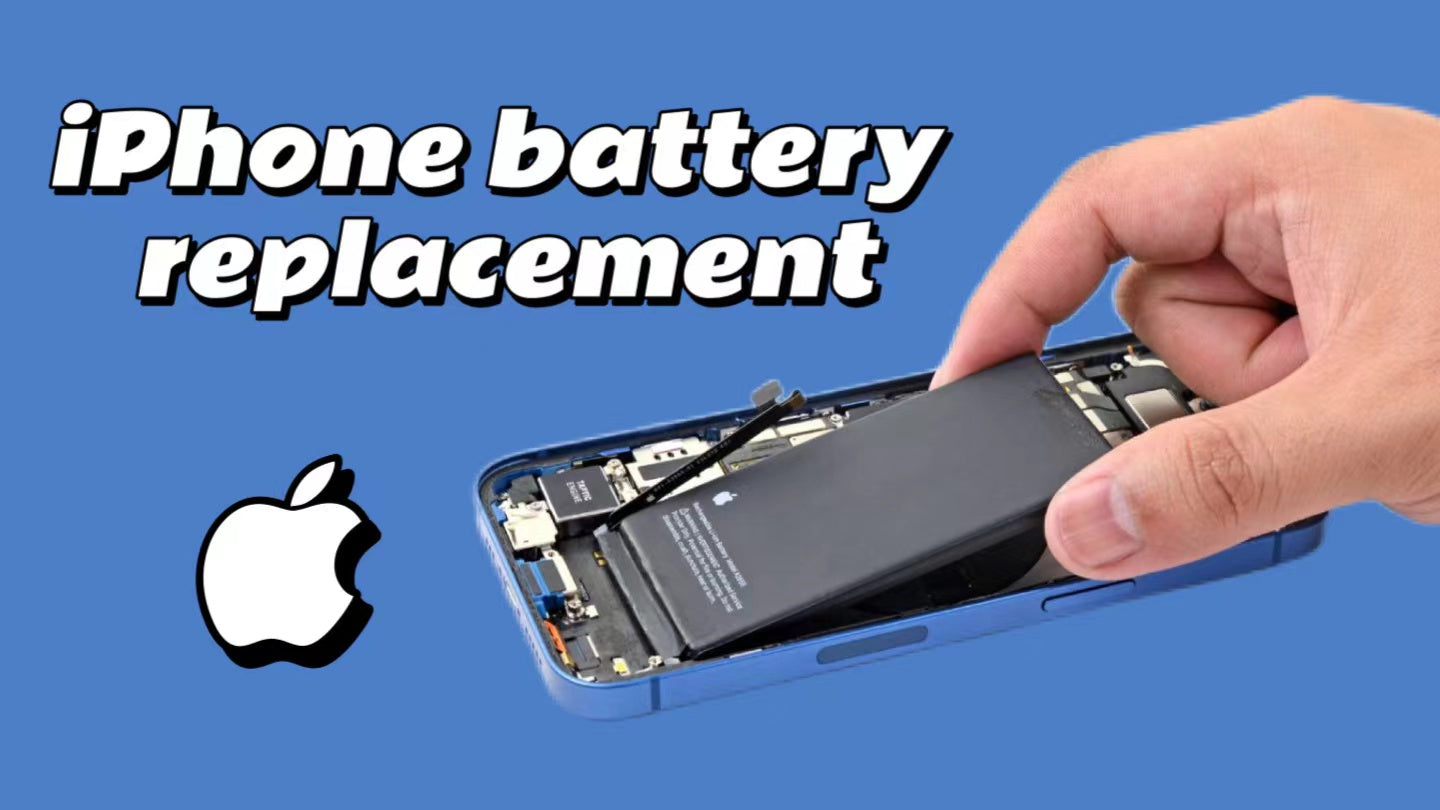
Battery is an important part of any electronic device and its performance decreases with time of use. For Apple device users, replacing the battery is an effective way to improve the battery life and performance of the device. But replacing the battery of an Apple device is a relatively complex process that requires certain technical knowledge and tools.
This article is a guide on how to replace your iPhone battery. The following will introduce in detail the steps and precautions for replacing the Apple battery.
1. Preparation
Before you begin replacing the battery, make sure you have the following tools and materials:
- Suitable battery replacement
- Screwdriver set (including pentalobe screwdriver)
- Pry bar or plastic card
- Suction cup
- Tweezer
- Static electricity wristband
- Detergent and cleaning cloth
2. Safety Rules
- Make sure your iPhone is completely turned off and unplugged the power cord.
- Use a static electricity wrist strapto prevent static electricity from damaging the internal components of your device.
- Do not use metal tools during operation to avoid short circuits.
3. Remove the old battery
- Remove the back cover: Use a suction cup and a pry barto carefully remove the back cover of the iPhone.
- Remove the screws: Use a screwdriver to remove the screws that hold the battery in place.
- Disconnect: Use a plastic card or pry bar to gently pry up the battery connector and disconnect the battery from the motherboard.
- Remove the battery: If the battery is attached with glue, use a plastic card to slowly pry up the battery.
4. Install new battery
- Check the new battery: Ensure that the new battery is not damaged and the model is compatible with your iPhone.
- Place the battery: Place the new battery into the device, making sure the battery connectors are properly aligned.
- Connect the battery: Gently press the battery connectorsto make sure they are firmly connected to the motherboard.
- Secure the battery: Reinstall the screws that secure the battery.
5. Reassemble the iPhone
- Install the back cover: Put the back cover back in place and make sure all the clips snap in correctly.
- Check function: Turn on your iPhone and check whether it is working normally, paying special attention to whether the battery is charged and discharged normally.
6. Common problems and solutions
- Battery cannot be charged: Check that the battery connector is clean and securely connected.
- Device does not recognize the new battery: Try resetting the iPhone or updating the system.
- Swollen battery: Stop using and replace batteryimmediately. A swollen battery may pose a safety hazard.
7. Professional service
If you are not confident enough in your maintenance experience or are worried about damaging your iPhone, you can opt for a professional repair service. Apple officially offers battery replacement services, or you can choose a reputable third-party repair store.
8. Environmental protection treatment
The replaced old batteries should not be thrown away at will, but should be handed over to professional recycling organizations for processing to reduce the impact on the environment.

Summary
Replacing the battery of your iPhone can significantly improve the experience of your device, although the process requires some technical knowledge and patience. Remember, if you're not sure how to operate, seeking professional help is always a safe option.
Please note that above is a general guide and the specific steps may vary depending on the model and year of your Apple device. Before attempting to replace the battery, it is recommended to consult the device-specific service manual or watch the related tutorial video. Additionally, replacing the battery yourself may void your device's warranty, so please consider this carefully before making any repairs.
Also: Click here to see OTOFLY iPhone silicone cases.
